
Rick & Morty Interactive Meeseeks Installation
Here's how to install your Interactive Lit Kirkland Meeseeks character. Please ignore the fact that the character is already installed in our images below.
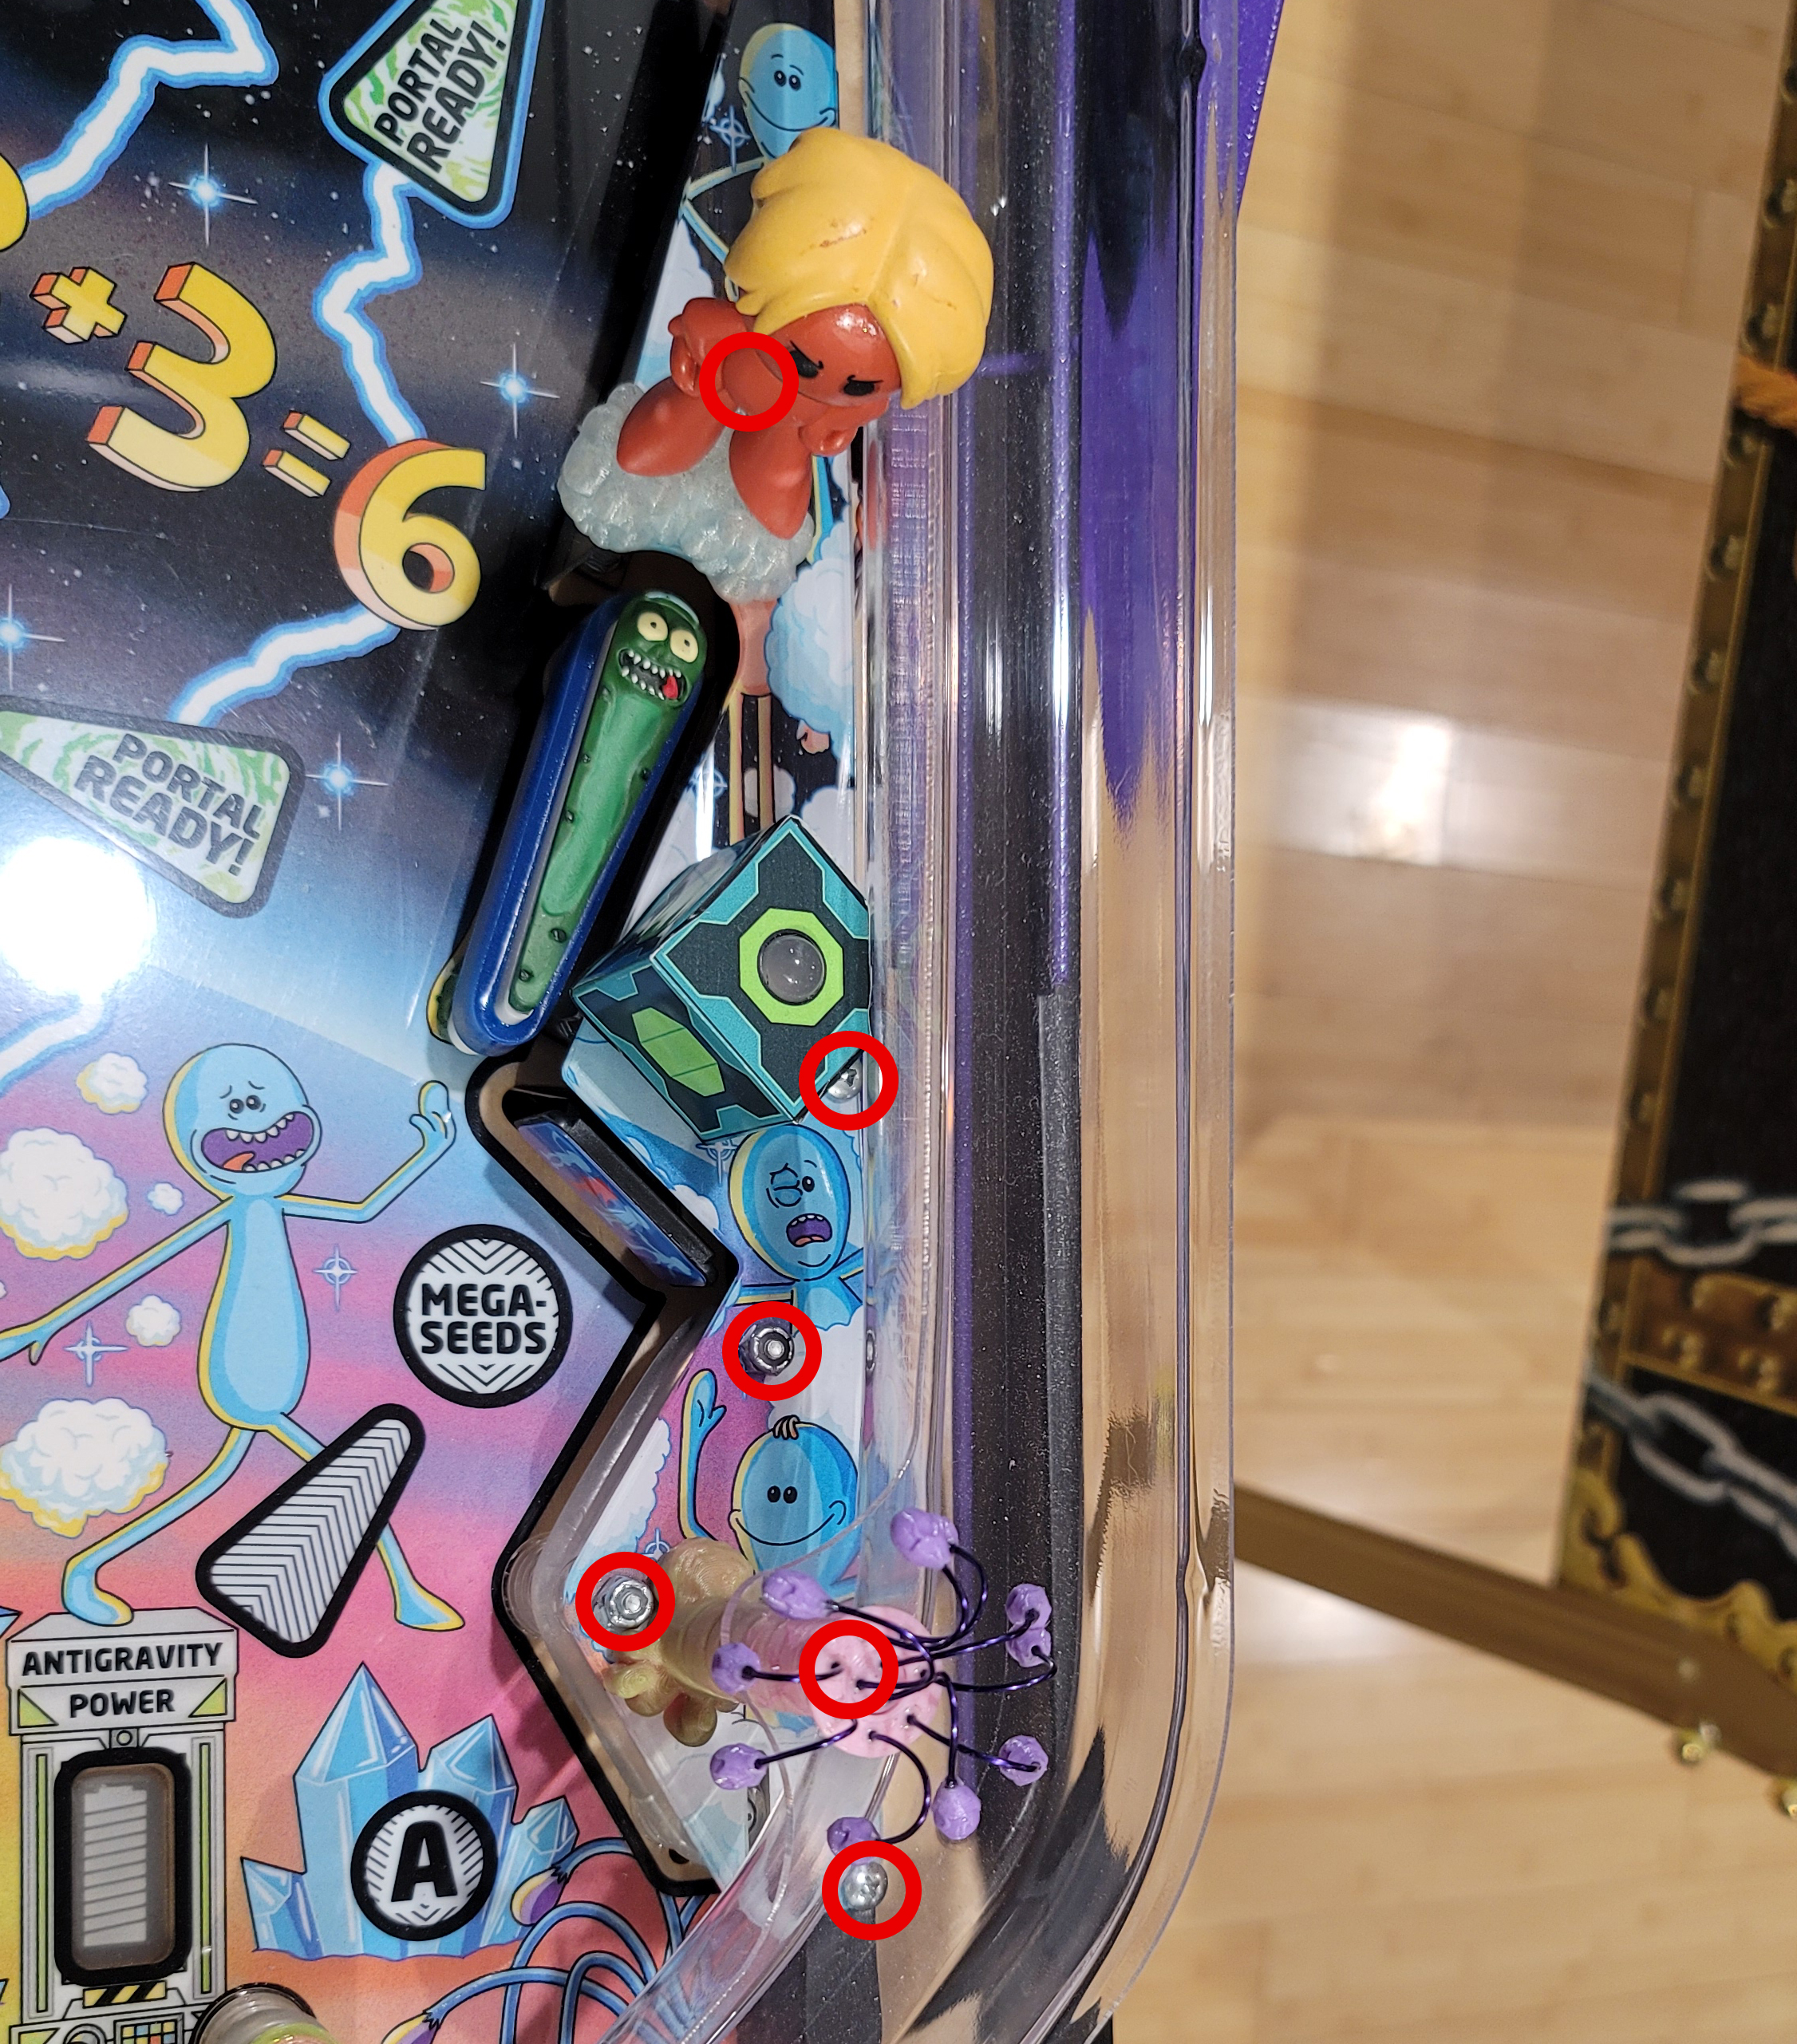
1. Remove the lockbar, glass and pull the playfield out to the first service position.
2. Remove the following screws/nuts, circled in red. The goal is to free up the front of the ramp and the printed plastic piece that has the Meeseeks Box on it. There is one nut which is behind the Meeseeks in this image but is clearly visible before installing the mod. In this image our Megaseed Tree mod is installed as well. In your stock game there will be a plainly visible screw holding the ramp to the Megaseed Tree, which needs to be removed. One or more of the screws may not be accessible until you loosen the aforementioned screw which allows the ramp to be gently pushed to the side to access those screws.
3. When all of the screws and nuts are removed the plastic with the Meeseeks Box on it should be loose. Rotate the plastic so it is sitting on the playfield upside down and unplug the black 4 pin socket going to the light inside the Meeseeks box.
4. The mod comes with a cable that has a 4 pin plug and a 4 pin socket. The plug (4 prongs) will go in to the black socket you just removed from the Meeseeks Box. It may be smart to put a piece of tape around this connection, once tested, since you will then want to stuff this connection back down through the hole in the playfield.
5. Attach the red 4 pin socket from the mod wiring to the Meeseeks Box where the black socket was originally.
6. Power the game on and go to the service menu. Choose Tests and then All Lighting. The light test should cycle through the colors. Confirm that the Meeseeks Box light as well as the light on the mod are lighting up the same colors as the rest of the playfield. If both the mod and the box lights are out then flip 180 degrees the 4 pin connection to the black socket. If the box lights are the only issue, flip the red socket connection to the Meeseeks Box.
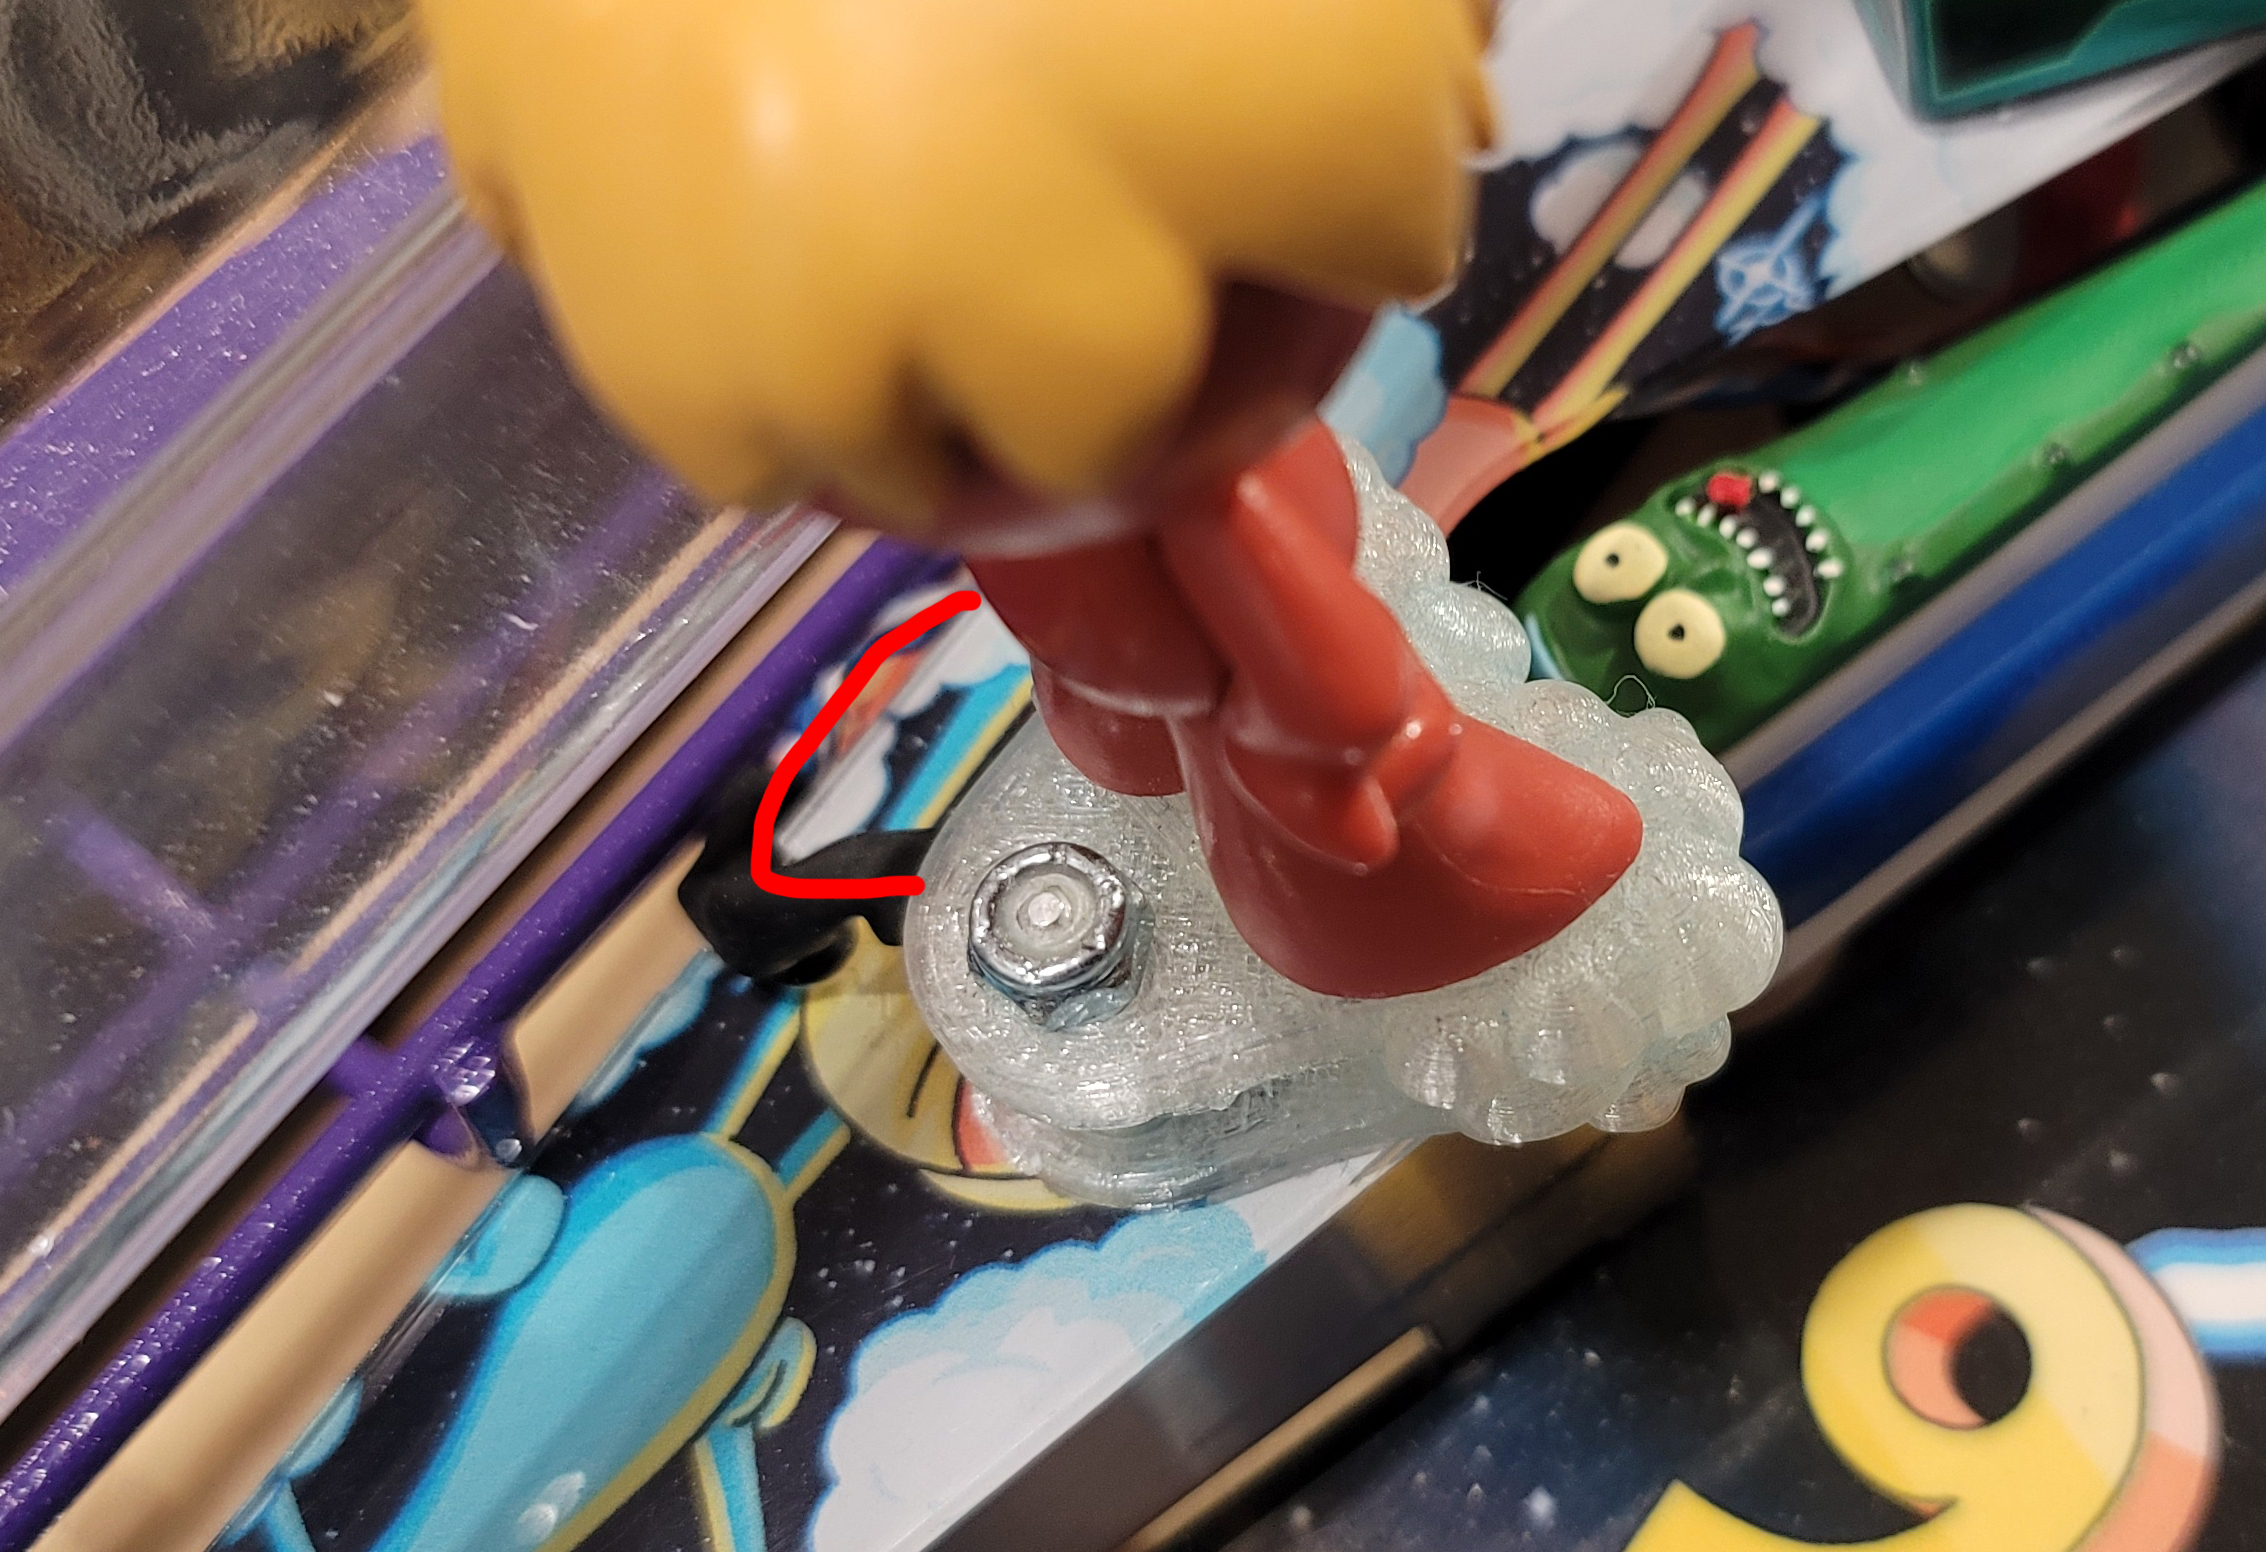
7. The toughest part of this install is routing the wires back to the character. There is no special trick. As you put the plastic back in place the two twisted strands of wire going to the cloud lighting will stay under the plastic until they reach behind where the character mounts. They will then exit the right side of the plastic, under the shooter lane wireform and to the cloud. These wires can be bent sharply to wrap around the top of the plastic. This may take a bit of trial and error. If you are willing you can notch out the plastic slightly with a dremel so the wires have a slot to come through.
The image below shows a red line where the wires are traveling up around the plastic and to the cloud.
8. The rest of the reassembly is the reverse of the plastic and ramp removal. When it comes time to mount the cloud first install the threaded hex adapter in place of where the original nut was. The cloud then slips over that hex post and is secured with the nut, as shown in the picture above.