The Winged Monkey Mini Controller (MC) has several complex functions which are only understood through the details provided below. Please read and understand these details to better help you enjoy your Monkey experience. The installation guide video will help you get the Monkey properly installed in your game as well as help you learn the remote control programming commands. A link to the video is provided to view directly on YouTube to view the chapters within the description if you are looking for a specific section.
Debugging & LED Indicator Explanations
Monkey Timeout
The MC has a built in timeout function. During normal operation if the Monkey is flying for more than 20 seconds the system will go into timeout mode. Timeout mode is indicated in two different ways. The Monkey will indicate this by lighting up one eye solid red, all other lights and functions will be disabled. Due to the eye configuration it may look like both eyes are lit, so be aware of this confusion. As well, the status LED on the MC will continually blink blue every 1/2 second on and off. These two indicators show that the timeout mode has started.
To exit timeout mode there are a few options.
- If the Monkey returns home (to the Castle where the magnet is situated) this will begin a reset process. The other Monkey eye will light up orange/yellow and will fade it's way to red as the reset progresses. This takes only a few seconds and once done the eye lights will go out (since the Monkey is home and not needing to fly).
- If you press any of the settings buttons on the remote (numbers 1-8 along with # and *) the programming mode will start and the timeout will end. Once programming is done the Monkey will be in a reset state and will fly again immediately.
- Restarting the Monkey will reset everything back to the original state. This can be done by restarting your entire game or simply unplugging the power to the Monkey and plugging it back in.
Monkey Home
The Monkey senses that it is "Home" and in the upper most location near the Castle in your WOZ pinball machine via a small magnet that is included with your Monkey. This is on a longer black "stick" which attaches to the backboard of the machine. The magnet must line up with the sensor on the back of the Monkey assembly (a small black rubber tab, the furthest most rear part of the entire assembly). It is easy to know that this is functioning properly as the Monkey will go into Sleep Mode when the magnet is lined up. All lights and functions will turn off. If the alignment of these pieces is not correct and the Monkey continues to fly while Home the Monkey will eventually enter Timeout (see Monkey Timeout) and will need to be reset.
Programming Mode
The IR remote which comes with the Winged Monkey has a decal on the rear which gives all of the basic settings control for the operation of the Monkey. There are 3 distinct features that can be controlled, Eyes, Feet and Wings. These settings are described in the Settings section. When the Monkey is in programming mode only the distinct feature being programmed will function. For example, if a button between 1 and 4 is pressed the Eye programming mode is activated. Only the eyes will light up and they will display the color, brightness, effect and speed which are currently set. To end programming mode press the "OK" button (between the 4 arrows) on the remote and your settings will be saved.
Reset To Default
There is a hidden function to reset all settings to the default configuration. This can be used to get a baseline for your settings if you are unsure what might be currently configured. To reset to default settings enter any programming mode (press 1 on the remote, for example) and then press the number nine (9). The Monkey eyes and feet will light up and fade from violet to blue and the functions will all be reset to their original configuration. Programming mode will also end and the Monkey will be ready to fly. If it is away from Home it will start flying immediately. All settings will be overwritten by resetting to default.
Common Issues
Issue: The Monkey keeps flying even when it is home at the castle.
Answer: The magnet attached to the backboard is not lining up with the magnet sensor on the back of the monkey. Adjust the magnet so when the monkey is home it stops moving.
Issue: The Monkey has one eye red.
Answer: See details below regarding Eye Color Designators.
Issue: The monkey will not fly. All lights are off.
Answer: Make sure the Monkey is away from home and no magnets are present near the magnet sensor. Check the control box for the green power light. If the light is not present check the power cable. If the light is on, unplug the power cable and confirm the Monkey cable (8 pin) is attached well. Plug the power back in and confirm the status LED flashes several times and turns off, indicating the system has started up. If the Monkey still will not fly try pressing the #1 key on the remote. If the Monkey does not respond in any way contact us for further debugging.
Issue: The Monkey will not respond to the remote.
Answer: Hold the remote inside the coin door to the right and point it at the control box. You may need to test different locations under the playfield to get a line of sight to the MC. You can confirm the remote is working by pulling out the playfield and pointing the remote directly at the IR sensor window on the MC and pressing the #1 button. If this does not solve the issue then replace the remote battery. You can confirm the remote is working by pointing it at the camera on your phone (while viewing the camera app) and pressing the buttons. The IR LED on the front of the remote will dimly light up with each press.
Eye / Debug Color Designators
- One Eye Red - The Monkey has timed out. This happens after 20 seconds of flying. To reset the Monkey send it back home and make sure the magnet is aligned with the magnet sensor. Once aligned the other eye will light up yellow and will slowly fade to green as the Monkey resets. Both lights will then turn off once the Monkey is ready to fly again.
- One Yellow / One Green - This is the wing setting mode. The eyes will be lit up this way anytime you are setting the wing effect or wing speed. Once you are done you can hit the OK button on the remote or any of the other programming options.
- Purple Blinking - If programming of the Monkey is attempted in the home position the eyes will briefly blink purple. Move the Monkey down out of the home position (away from the castle) to enable programming.
- All Lights Blue Blinking - When the default settings are applied (enable programming mode and then press the "9" key) the Monkey will briefly flash all lights blue. Once complete the Monkey will be set to the default colors, speed and effects.
Status LED Indicator
- Several Flashes - This occurs when the MC is first powered up and is an indicator the system is starting up.
- Solid Blue - When the Monkey is setting the default parameters the status LED will remain on solid for a few seconds.
- Constant Flashing - The status LED will consistently flash every 1/2 second to indicate the Monkey has timed out. One eye will light up red, as well. See above section "One Eye Red" for further details.
Programming
Using the included remote you can setup several different options for the various functions of the Monkey. When you are not in programming mode pressing any programming button will enter programming mode. Until the OK button is pressed the Monkey will stay in programming mode. The remote buttons are described below.
- 1 - Eye color (52 options)
- 2 - Eye brightness (8 options)
- 3 - Eye effect (5 options)
- 4 - Eye effect speed (15 options)
- 5 - Feet color
- 6 - Feet brightness
- 7 - Feet effect
- 8 - Feet effect speed
- 9 - Reset all settings to default
- # - Wing Speed (15 options)
- ✱ - Wing Effect (3 options)
- ⇧ - Increase setting
- ⇩ - Decrease setting
- OK - Save changes and exit programming mode
To change a specific setting press that setting button and then use the UP and DOWN arrows on the remote to cycle through the options for that setting. For example, to change the color of the eyes press one (1) on the remote (the eyes will then light up) and press either the up or down arrow to change the color. Since there are 52 color options a single press will not make a large difference in the visual effect of the color. Holding down the up or down arrow will change the setting rapidly.
End/Beginning of Settings Indicator
When modifying any setting once you get to the end of the numeric values available (for example, color #52) the next press which exceeds this number will show an indication on the Eyes (no matter which setting or area of the Monkey you are modifying) that you are now starting at the end or beginning. So, at color #52 if you press the up arrow the eyes will light up with one green and one yellow eye. This indicates in which direction you are going (green points to the right for up). After showing the indicator the next setting in order will be shown. So, once you pass #52 the eyes indicate this and then the #1 setting will be shown. You are free to go in either direction, the indicator is simply there to give you a sense of when you're "starting over" with the options. This can be helpful for brightness settings as well as speed settings.
Effects
The lighting portions (eyes and feet) of the Monkey have similar setting options, the wings are unique. For the eyes and feet the effect options are as follows:
- Solid
- Fade In & Out Together
- Fade In & Out Alternating
- Blink Together
- Blink Alternating
The wing effects are as follows:
- Constant Flapping
- Occasional Flapping (flap ... stop ... flap ... stop)
- Faded Flapping (like a light fade, increases speed and then slows down repeatedly)
Speed
Again, the eyes and feet act in the same manner. There are 52 speed options from a very slow, occasional effect to a very rapid flash. The speed of the fade effect will be "affected" also by the brightness setting you have selected. Consider that a fade is from 0 to 100 brightness and if the brightness is set very low there are many less steps that can be taken to get from 0 to 100. If the speed is also very high then there are almost no steps to take and so a fade may look like a flash. Adjusting the brightness to a higher level can make the fade slower even if the speed is still the same. Play with both options to get the speed you like.
The Wing speed will change how fast the wings flap. For setting #1 (constant) this is straight forward. From a very slow movement to very rapid flapping. The other two settings use the speed for how quickly the wings flap as well as how quickly the effects present themselves. Play with these settings to find what works for you.
MOTOR STALL - Be aware. Slow speeds on the motor can cause the motor to stall. The stall may be overcome eventually but may also not. If the wings are not flapping when they should be (during Wing settings or when the Monkey is flying) you should check this setting immediately. While it is not a fatal issue, this can cause the motor to overheat and burn out. There is a lower limit hard coded into the controller to prevent this but there are differences in each monkey, the friction of the wing mechanism, etc. which can possibly allow this to happen.
Experience the Magic of the Winged Monkey
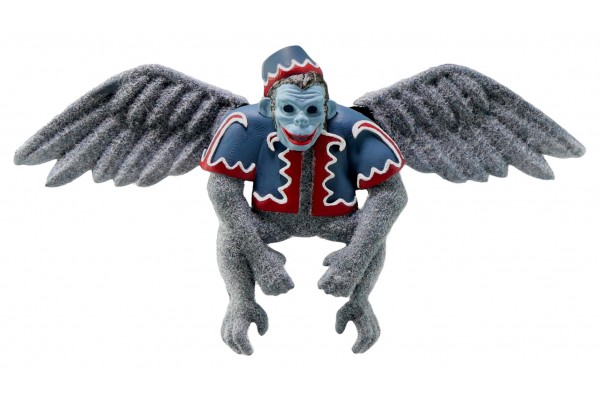
Behold, the incredible Winged Monkey – a masterpiece of artistry and precision. No Wizard of Oz pinball machine is truly complete without this mechanical marvel. Crafted with meticulous attention to detail, we've spared no effort in recreating this iconic character from the beloved movie. The result? A physical representation that captures the essence of the original while adding that extra dash of whimsy and excitement we all adore.
A Labor of Love
Months of painstaking labor have been invested to ensure that every aspect of the Winged Monkey, from its tiny fingers to its toes, stays faithful to the movie's charm and our uncompromising standards. Our goal is to elevate your pinball experience by transforming one of the finest pinball machines ever made into a work of art, where every detail matters, and the plastic barriers disappear.
Cutting-Edge Technology Meets Artistry
Each Winged Monkey is powered by our in-house custom-designed mini controller. Driven by a microprocessor, it features a robust power-handling circuit, an infrared remote control receiver, two status LEDs, lighting control, an inline resettable fuse, and a hassle-free plug-and-play wire harness. The monkey itself boasts four distinct mini addressable LED lights, a super-compact micro-planetary geared motor, and an ingenious cam shaft drive system that animates its wings. The eyes, the feet (illuminating the ball when the monkey holds it), and the wings can all be customized independently with up to four parameters: brightness, color, effect type, and speed. All of this can be controlled remotely while the glass is on and the game is in play, thanks to our custom IR remote management system.
Effortless Installation
Replacing the stock monkey plastic in your game is a breeze. With just a few screws, zip ties, and plugs, you'll be ready to soar. Our installation utilizes a magnetic detection system that triggers the mechanism. The Winged Monkey comprises over 10 meticulously crafted, custom-designed parts, all modeled in a 3D environment to ensure a perfect fit and efficient use of available space. With a parts list boasting over 40 unique items, each monkey is hand-finished, custom-painted, and adorned with meticulously applied fur to replicate the monkey's original costume design from the movie.
The Power of Invisibility
Our package also includes an invisible coil cover, a slim custom-fit piece that discreetly conceals the yellow coil that holds the ball. No more unsightly distractions; we've developed this snap-on cover for a clean and easy installation. To achieve the ultimate hidden effect, we've used the world's blackest black paint, a rare and costly substance that makes objects painted with it seemingly disappear. These meticulous details extend to other partially visible areas of the mechanisms, making them blend seamlessly into the shadows. It's as if they never existed, like a black hole of perfection. These are the details we pride ourselves on, creating advanced and intricate works of art.
This amazing Winged Monkey is detailed in every possible way, a true work of art. Any Wizard of Oz pinball machine is incomplete without this mechanical marvel. Designed with as much exacting specification to the movie original as we could muster, we have tried very hard to make this little guy a true physical representation of the original while adding in the bells and whistles we all love.
Features
- 4 Super Bright WS2812 Addressable RGB LEDs: You'll find one behind each eye and one behind each foot, adding mesmerizing lighting effects that truly bring the Winged Monkey to life.
- Micro Planetary Geared 6v Precision Motor: This tiny but powerful motor drives the Winged Monkey's captivating wing motion with precision.
- Custom Developed Mini Controller Board: Equipped with a microprocessor, voltage regulation, IR handling, and more, our mini controller board is the brains behind the magic.
- IR Remote Control: Change settings with ease even with the glass on. Take control of your Winged Monkey's performance.
- Circuit Protection, Resettable Inline Fuse, Power Indicator LED & Diagnostics LED: We've thought of it all to ensure a smooth and safe experience.
- Plug & Play Custom Wire Harnesses: Installation is a breeze with our custom wire harnesses, connecting seamlessly to both your game's power and the Winged Monkey.
- Hand Applied Fur Flocking / Hand Painted: Every detail counts. Hand-applied fur flocking and meticulous hand-painting bring the Winged Monkey to life, paying homage to the original movie costume design.
Winged Monkey - WOZ Flying Monkey Mod
- Game: Wizard of Oz
- Product Code: FLYING-MONKEY
- Availability: Stocked
-
$645.00
Related Products
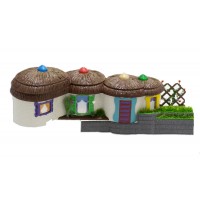
Munchkinland Hut Upgrade
One of the remaining items on Jersey Jack Pinball's WOZ that needed some attention was the Munchkinl..
$395.00
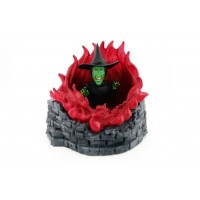
Flaming Witch Mod with Realistic Fire
Here is an alternative to your tired, bored, encapsulated witch. This is meant as a plug and play, d..
$345.00
Ramp Entrance Sign (WoZ)
"Now which way do we go?" "Pardon me, this way is a very nice way." When you aren't quite sure w..
$225.00

